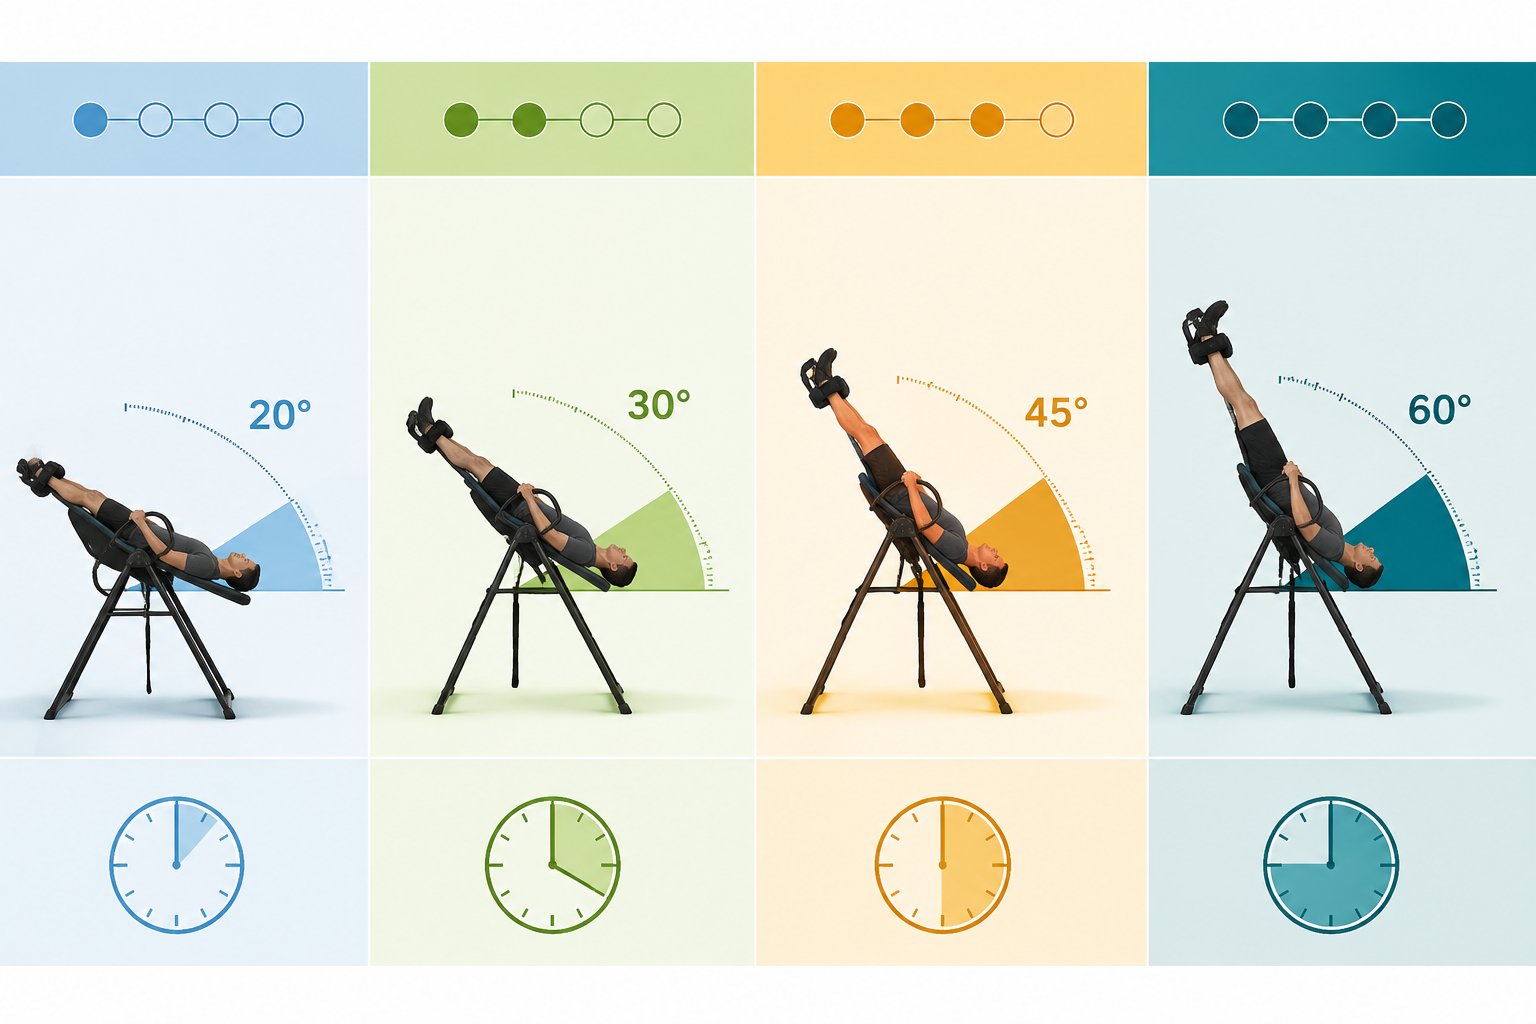
Starting inversion therapy requires a structured 30-day progression that begins with just 1-2 minutes at a shallow 20-30 degree angle and gradually builds to 3-5 minutes at 45-60 degrees. This slow progression allows your body to adapt safely while minimizing risks like dizziness or blood pressure spikes. Most beginners see noticeable benefits after committing to consistent daily sessions throughout the full month.
Key Takeaways
Start shallow and short: Begin at 20-30 degrees for only 1-2 minutes during your first week
Frequency beats duration: Multiple short sessions (2-3 minutes each) work better than one long session
Progress slowly: Increase angle by 15 degrees every 7-10 days based on comfort level
Never exceed 5 minutes: Even experienced users should limit sessions to prevent blood pressure issues
Consistency matters most: Daily use for 30 days produces better results than sporadic longer sessions
Listen to your body: Discomfort means you’re progressing too fast—back off and stabilize
Use safety straps: Tether straps control your angle and prevent accidental full inversion
Check contraindications first: Certain medical conditions make inversion therapy unsafe
What Is Starting Inversion Therapy and Why 30 Days?
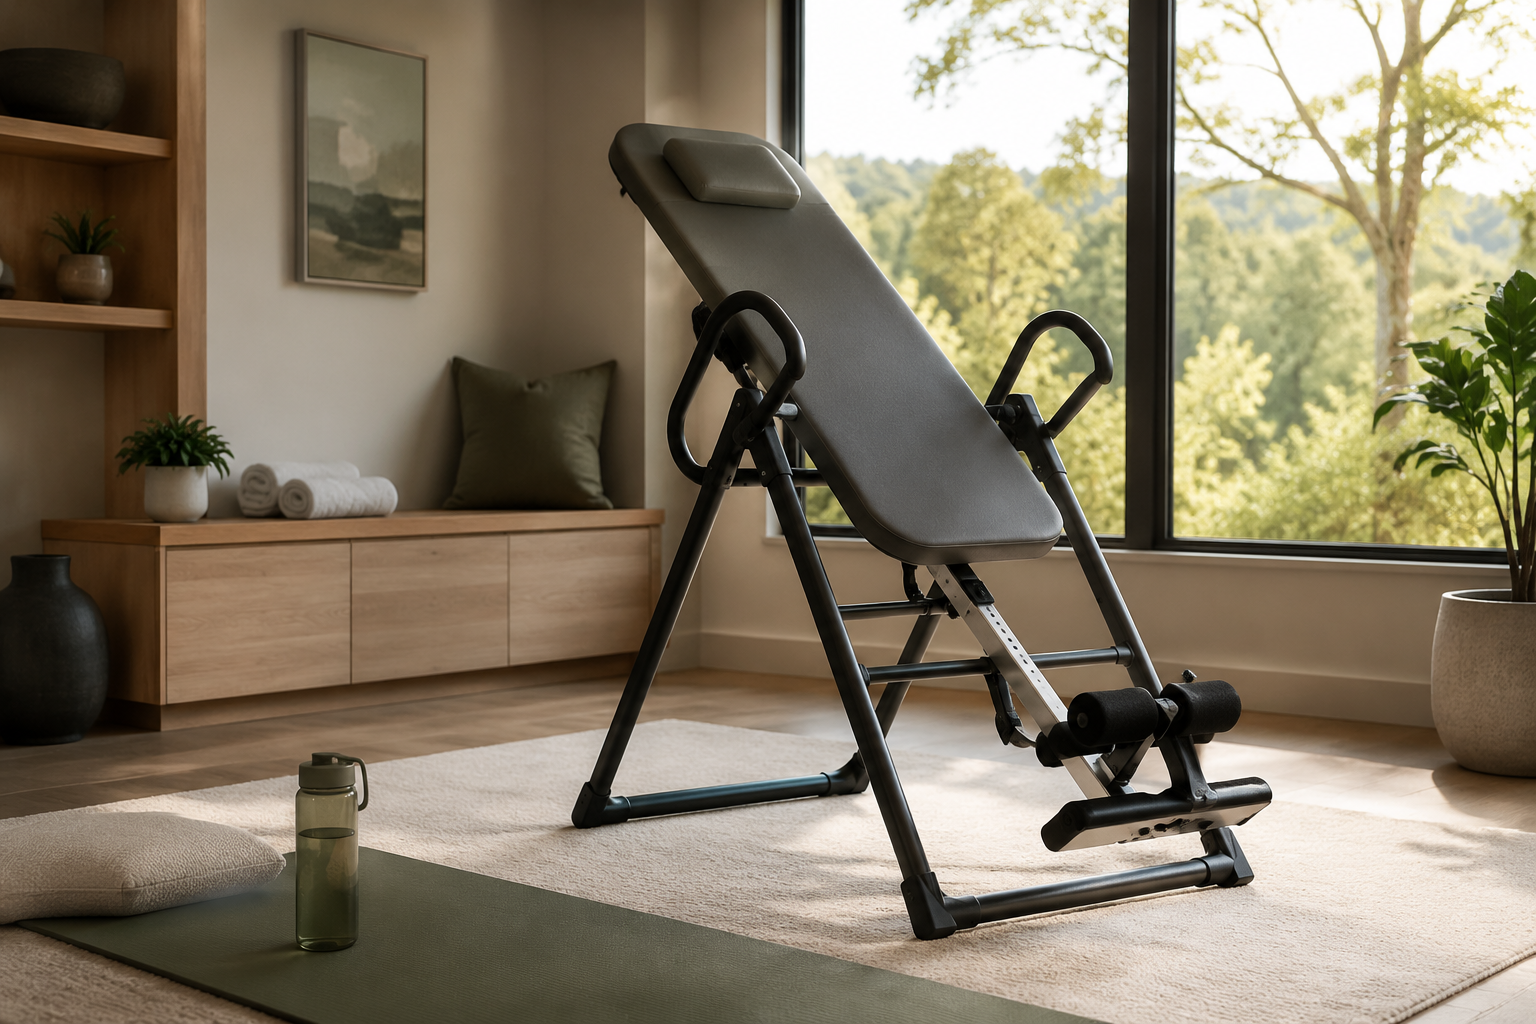
Starting inversion therapy means using an inversion table to hang at various angles (typically 20-90 degrees) to decompress the spine and potentially relieve back pain. The 30-day timeframe isn’t arbitrary—it’s the minimum period most people need to adapt their cardiovascular system, build tolerance, and experience measurable benefits.
Your body needs time to adjust to being upside down. Blood pressure changes, inner ear balance, and muscle tension all respond differently when inverted. Rushing this process leads to dizziness, headaches, or worse—giving up before you see results.
Why beginners quit too early:
Expecting instant pain relief after one session
Starting at too steep an angle and feeling uncomfortable
Not understanding that benefits accumulate over weeks
Skipping days and losing momentum
The 30-day commitment creates a habit while your body gradually adapts. Most users report noticeable improvements in flexibility, reduced back tension, and better posture after completing a full month of consistent practice.
Before starting inversion therapy, review who should not use an inversion table to ensure you don’t have contraindications like glaucoma, high blood pressure, or heart disease.
How Should Beginners Set Up Their Inversion Table for Starting Inversion Therapy?
Set your inversion table height using the locking pin system, adjusting it to match your height within one inch. Start with the height setting one inch taller than your actual height—this accounts for weight distribution and makes it easier to return to upright position.
Essential setup steps:
Secure the ankle clamps firmly but not painfully tight—you should fit two fingers between the clamp and your ankle
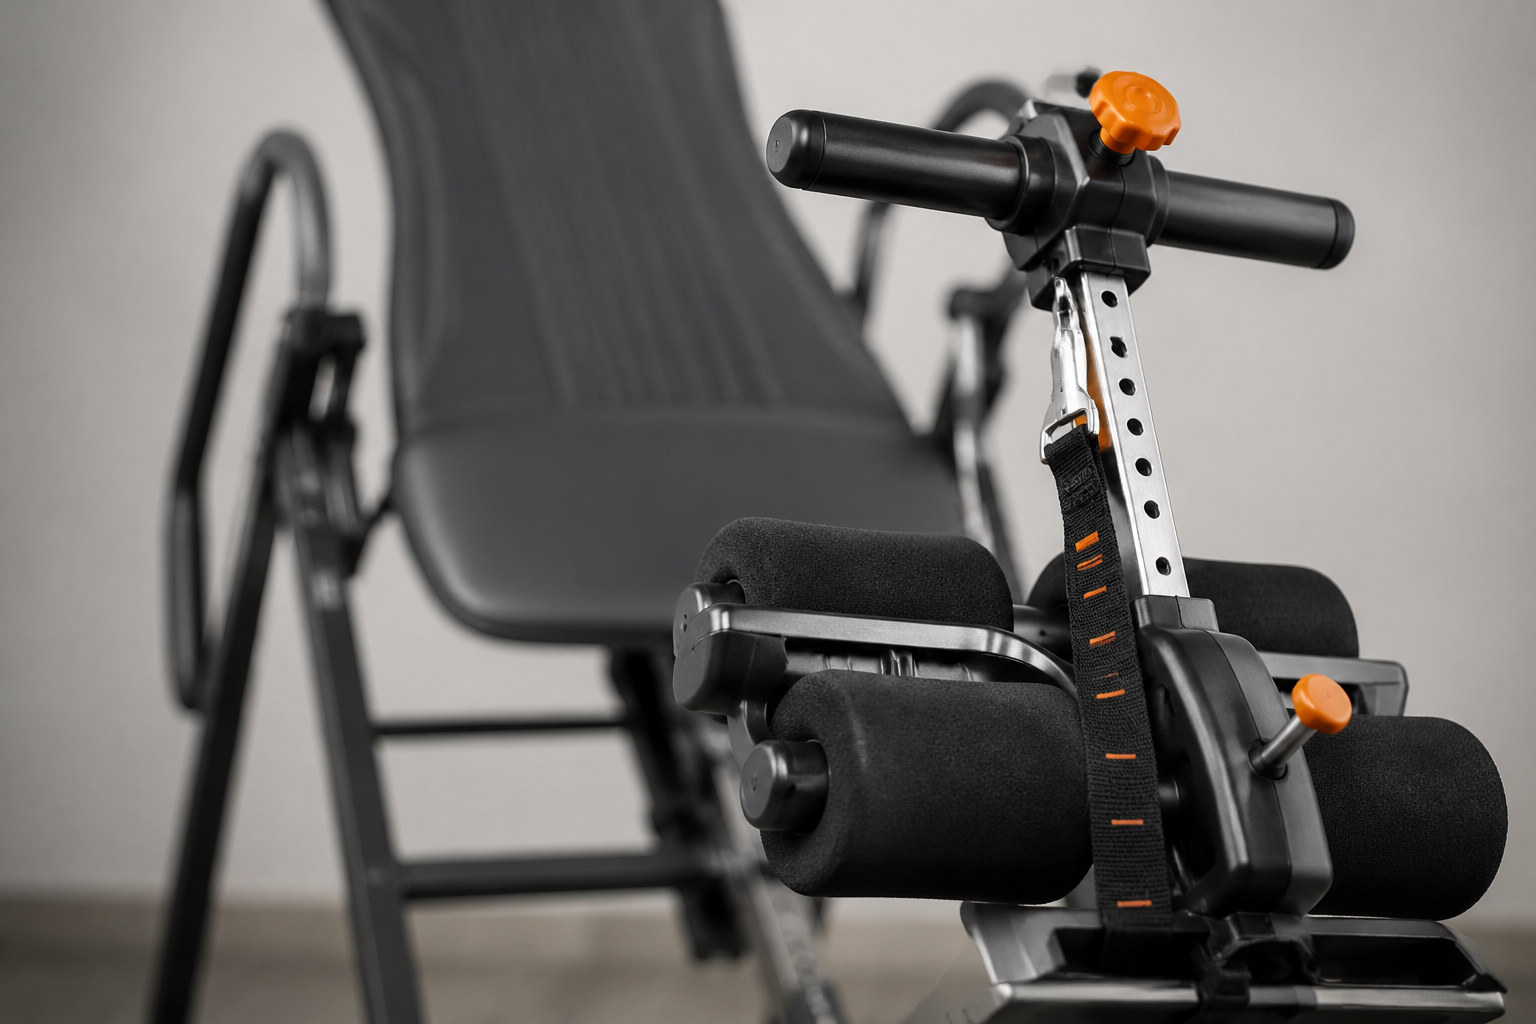
Attach the tether strap to limit your maximum angle (critical for beginners)
Set the tether to the 20-30 degree marking for your first week
Test the pivot point by gently leaning back while holding the handles
Keep the table on a flat, stable surface with at least 2 feet of clearance on all sides
The tether strap is your safety net. It prevents you from accidentally flipping to a steeper angle than intended. Many beginners skip this step and end up at 60-70 degrees on their first try, which can cause panic and dizziness.
Common setup mistake: Setting the height too short makes it nearly impossible to return upright without help. If you’re struggling to come back up, increase the height setting by one inch.
For detailed setup instructions, check out our guide on how to use an inversion table safely.
Week 1 (Days 1-7): What Angle and Duration for Starting Inversion Therapy?
Limit your first week to 20-30 degrees for 1-2 minutes per session, once or twice daily. This shallow angle provides spinal decompression benefits without stressing your cardiovascular system or triggering balance issues.
Your Week 1 protocol:
Angle: 20-30 degrees (tether strap set to first or second marking)
Duration: 1-2 minutes maximum per session
Frequency: 1-2 sessions daily (morning and evening work well)
Focus: Getting comfortable with the sensation and learning to relax
At 20-30 degrees, you’re barely tilted—it feels more like a reclined chair than hanging upside down. This is intentional. Your goal this week is acclimation, not aggressive treatment.
What to expect:
Mild stretching sensation in your lower back
Slight pressure change in your head (normal and temporary)
Muscle tension as your body adjusts to the new position
Possible mild dizziness when returning upright (should fade within seconds)
Red flags that mean stop immediately:
Sharp pain anywhere in your spine
Severe headache or vision changes
Nausea or extreme dizziness
Chest pain or difficulty breathing
If you experience any red flags, return upright slowly and consult a healthcare provider before continuing. Understanding the dangers of inversion tables helps you recognize when something’s wrong versus normal adaptation.
Week 2 (Days 8-14): How to Progress Your Inversion Angle Safely?
Increase to 30-45 degrees for 2-3 minutes per session after your body has adapted to the initial angle. Move the tether strap to the next marking (usually labeled on the table frame) and test the new angle for just 30 seconds before committing to a full session.
Week 2 progression strategy:
Days 8-9: Test 30 degrees for 30 seconds, then complete 2-minute sessions
Days 10-12: Increase to 35-40 degrees if comfortable, maintain 2-3 minute duration
Days 13-14: Attempt 45 degrees for 2 minutes, or stay at 40 degrees if needed
The key phrase is “if comfortable.” Progression isn’t mandatory—it’s optional based on how your body responds. Some people stay at 30 degrees for two full weeks and still get excellent results.
Testing a new angle safely:
Set the tether to the new position
Lean back slowly while holding the handles
Stop at the new angle and hold for 30 seconds
Notice any discomfort, pressure, or dizziness
Return upright and wait 2 minutes
If you felt fine, proceed with a full 2-minute session
Choose to stay at your current angle if:
You still feel significant pressure in your head
Your muscles haven’t relaxed at the current angle
You’re experiencing any lingering dizziness
You simply don’t feel ready to progress
There’s no prize for reaching steep angles quickly. The benefits of inversion therapy come from consistent practice at whatever angle feels right for your body.
Week 3-4 (Days 15-30): When Can You Reach 60 Degrees in Starting Inversion Therapy?
Work toward 45-60 degrees for 3-5 minutes per session during weeks three and four, but only if you’ve felt completely comfortable at 45 degrees for at least three consecutive sessions. The 60-degree angle (roughly the angle of your rear leg when standing) provides significant spinal decompression without requiring full inversion.
Week 3-4 progression:
Days 15-18: Stabilize at 45 degrees for 3-minute sessions
Days 19-23: Test 50-55 degrees for 2 minutes, gradually extend to 3 minutes
Days 24-27: Attempt 60 degrees for 2-3 minutes if previous angles feel easy
Days 28-30: Settle into your comfortable angle for 3-5 minute sessions
Important: You do not need to reach 60 degrees to benefit from inversion therapy. Many long-term users never go beyond 45 degrees and still experience excellent back pain relief and improved flexibility.
Signs you’re ready for 60 degrees:
Zero dizziness at 45 degrees
Muscles fully relax within 30 seconds of inverting
No residual head pressure after sessions
You can easily return to upright position without assistance
Signs you should stay at 45 degrees:
Mild discomfort that hasn’t resolved
Difficulty returning upright
Any lingering symptoms after sessions
Personal preference—45 degrees feels better
The maximum recommended session length is 5 minutes regardless of angle. Longer sessions don’t provide additional benefits and increase the risk of blood pressure complications.
How Often Should You Invert During Your 30-Day Starting Inversion Therapy Program?
Invert 1-2 times daily for short sessions rather than doing one long session. Multiple brief inversions (2-3 minutes each) provide better results than a single 10-minute session because they allow your spine to decompress, recover, and decompress again.
Optimal daily schedule:
Option 1 (Moderate approach):
Morning: 2-3 minutes after waking
Evening: 2-3 minutes before bed
Option 2 (Intensive approach):
Morning: 2 minutes after waking
Midday: 3 minutes after lunch or work
Evening: 3 minutes before bed
Option 3 (Minimal approach):
Once daily: 3-5 minutes at your preferred time
Most beginners start with Option 1 or 3 and may increase frequency after the first two weeks. The key is consistency—daily practice matters more than session length.
Best times to invert:
Morning: Helps decompress the spine after sleeping in one position
Post-workout: Aids recovery and reduces muscle tension
Evening: Promotes relaxation and may improve sleep quality
After sitting: Counteracts compression from prolonged desk work
Worst times to invert:
Immediately after eating (wait 2 hours)
When feeling dizzy or unwell
After consuming alcohol
When rushed or stressed (you won’t relax properly)
If you miss a day, simply resume the next day at your current angle and duration. Don’t try to “make up” for missed sessions by inverting longer or steeper—this increases injury risk.
What Are the Most Common Mistakes When Starting Inversion Therapy?
The biggest mistake beginners make is progressing too quickly, jumping from 30 degrees to 60 degrees within a few days because they feel fine initially. This often leads to severe headaches, dizziness, or muscle strain that forces them to stop completely.
Critical mistakes to avoid:
1. Skipping the tether strap
Using the table without angle control means you might accidentally flip to full inversion, causing panic and potential injury.
2. Inverting too long
Staying inverted for 10-15 minutes because it “feels good” can cause blood pressure spikes and severe headaches that last hours.
3. Forcing the angle
Pushing through discomfort to reach a steeper angle damages trust in the process and may cause muscle strain.
4. Inconsistent practice
Inverting three times one week and zero times the next prevents your body from adapting and building tolerance.
5. Ignoring contraindications
Using an inversion table despite having glaucoma, high blood pressure, or other conditions that make it dangerous.
6. Poor ankle security
Loose ankle clamps can cause you to slip during inversion, leading to falls or panic.
7. Rushing the return
Coming upright too quickly causes head rush and dizziness—always return slowly over 5-10 seconds.
Choose a different approach if:
You have any cardiovascular conditions
You experience persistent pain (not just discomfort) during sessions
You can’t commit to daily practice for 30 days
You feel anxious or panicked when inverted
Alternative therapies like physical therapy, yoga, or spinal decompression devices may work better for people who can’t tolerate inversion.
How Do You Know If Your 30-Day Starting Inversion Therapy Program Is Working?
You’ll know inversion therapy is working when you notice reduced morning stiffness, improved flexibility when bending or twisting, and decreased back pain intensity during daily activities. These changes typically become noticeable around days 14-21 for most beginners.
Measurable progress indicators:
Physical improvements:
Can touch toes or reach farther than before starting
Less pain when standing up after sitting
Improved posture (shoulders back, less slouching)
Reduced muscle tension in lower back
Better range of motion in spine rotation
Subjective improvements:
Sleeping better through the night
Less reliance on pain medication
Feeling taller (from spinal decompression)
More energy throughout the day
Reduced stress and tension
Session-specific signs:
Muscles relax faster during inversion (within 30 seconds instead of 2 minutes)
No dizziness at angles that previously caused it
Can return upright smoothly without struggle
Feel refreshed rather than drained after sessions
Track your progress by:
Taking photos of your posture weekly
Measuring your reach in a toe-touch test every 5 days
Rating your pain level (1-10 scale) daily
Noting how long it takes to feel relaxed during inversion
If you see no improvements after 21 days of consistent practice, consult a healthcare provider. Inversion therapy doesn’t work for everyone, and persistent pain may indicate a condition that requires different treatment.
Combining inversion with proper nutrition can enhance results—learn more about how food choices boost your inversion table results.
What Happens After Completing Your 30-Day Starting Inversion Therapy Program?
After 30 days, you can maintain your current angle and duration (typically 45-60 degrees for 3-5 minutes) or experiment with slightly longer sessions up to the 5-minute maximum. Most users settle into a maintenance routine of 1-2 sessions daily at their comfortable angle.
Post-30-day options:
Option A: Maintenance mode
Continue your Week 4 protocol indefinitely—same angle, same duration, same frequency. This works well for people who achieved their goals and want to maintain benefits.
Option B: Gradual advancement
Slowly work toward 70-80 degrees over the next 30 days if you want deeper decompression. Add 5-10 degrees every 10 days, never exceeding 5 minutes per session.
Option C: Reduced frequency
Drop to 3-4 times weekly instead of daily once you’ve achieved your pain relief goals. Monitor whether symptoms return—if they do, resume daily practice.
Option D: Full inversion (90 degrees)
Attempt full inversion only after 60+ days of consistent practice and only if you have zero discomfort at 70-80 degrees. Full inversion isn’t necessary for benefits and carries higher risks.
Long-term best practices:
Never exceed 5 minutes per session regardless of experience level
Continue using the tether strap even after months of practice
Take breaks if you experience any new discomfort
Reassess your routine every 90 days
When to reduce or stop:
Pain increases instead of decreases
New symptoms develop (headaches, vision changes, joint pain)
Life circumstances change (pregnancy, new medical diagnosis)
You’ve achieved your goals and want to try maintenance with less frequency
Many people use inversion tables for years as part of their back health routine. The key is finding a sustainable frequency and angle that fits your lifestyle and continues providing benefits without causing problems.
If you’re ready to invest in quality equipment, check out our inversion table buying guide to choose the right model for long-term use.
Frequently Asked Questions
Can I start inversion therapy at 45 degrees instead of 20-30 degrees?
No, starting at 45 degrees significantly increases your risk of dizziness, headaches, and blood pressure spikes. Your cardiovascular system needs gradual adaptation—begin at 20-30 degrees for at least 5-7 days before progressing.
How long does it take to feel benefits from starting inversion therapy?
Most beginners notice reduced muscle tension and improved flexibility within 14-21 days of consistent daily practice. Significant back pain relief typically requires the full 30-day commitment, though some people feel improvements sooner.
Is it normal to feel pressure in my head during inversion?
Yes, mild pressure is normal as blood flow adjusts to the inverted position. It should be tolerable and fade within 30-60 seconds. Severe pressure, sharp headaches, or vision changes are not normal—return upright immediately if these occur.
Can I use an inversion table twice a day as a beginner?
Yes, two short sessions (2-3 minutes each) daily is safe and often more effective than one longer session. Space them at least 4-6 hours apart, such as morning and evening.
What if I can’t reach 60 degrees by day 30?
That’s completely fine. Many people stay at 30-45 degrees indefinitely and still experience excellent benefits. Progression is optional and should be based on comfort, not arbitrary timelines.
Should I invert before or after exercise?
After exercise is generally better, as inversion aids muscle recovery and reduces post-workout tension. Inverting before exercise may cause temporary dizziness that affects your workout performance.
Can I skip the tether strap after the first week?
No, keep using the tether strap throughout your 30-day program and beyond. It prevents accidental over-rotation and provides a safety limit even for experienced users.
What should I do if I feel dizzy when returning upright?
Return upright more slowly (take 10-15 seconds instead of 5), and sit on the table for 30-60 seconds before standing. If dizziness persists, you may be progressing too quickly—reduce your angle by 10-15 degrees.
Is starting inversion therapy safe for people over 60?
Age alone doesn’t disqualify you, but older adults should get medical clearance first, especially if they have any cardiovascular conditions, osteoporosis, or balance issues. Start at the shallowest angle and progress more slowly than younger users.
Can I read or watch TV while inverted?
Not during your first 30 days. Focus on relaxing your muscles and breathing deeply rather than distracting yourself. After you’re fully adapted, brief activities at shallow angles (20-30 degrees) are fine, but never at steep angles where you need to monitor your body’s response.
How do I know if I’m progressing too fast?
Warning signs include persistent headaches after sessions, increased back pain instead of relief, difficulty sleeping, ongoing dizziness, or feeling anxious about your next session. If any of these occur, reduce your angle by 15 degrees and stabilize for another week.
What’s the difference between 60 degrees and full 90-degree inversion?
At 60 degrees, you get substantial spinal decompression with moderate cardiovascular stress. At 90 degrees (full inversion), blood pressure changes are more dramatic and risks increase significantly. Most therapeutic benefits occur at 60 degrees or less—full inversion is optional and not recommended for beginners.
Conclusion
Starting inversion therapy with a structured 30-day progression gives your body the time it needs to adapt safely while maximizing the potential benefits for back pain relief and spinal health. The protocol is straightforward: begin at 20-30 degrees for 1-2 minutes during Week 1, progress to 30-45 degrees for 2-3 minutes in Week 2, and work toward 45-60 degrees for 3-5 minutes during Weeks 3-4.
Remember that frequency matters more than duration—two short daily sessions beat one long session every time. Use your tether strap religiously, listen to your body’s signals, and never push through sharp pain or severe discomfort. Progress is optional; comfort and consistency are mandatory.
Your next steps:
Get medical clearance if you have any cardiovascular conditions, glaucoma, or other contraindications
Set up your inversion table properly with height adjustment and tether strap
Start your Week 1 protocol tomorrow—20-30 degrees for 1-2 minutes
Track your progress with daily pain ratings and weekly flexibility tests
Commit to the full 30 days before deciding whether inversion therapy works for you
The difference between people who benefit from inversion therapy and those who quit isn’t genetics or luck—it’s following a gradual progression and sticking with it long enough to see results. Your 30-day journey starts with a single 2-minute session at a gentle angle. Take that first step today.
SEO Meta Title: Starting Inversion Therapy: 30-Day Beginner Guide
Meta Description: Master starting inversion therapy with this 30-day progression guide. Learn safe angles, duration, and frequency for beginners to maximize back pain relief.
Tags: starting inversion therapy, inversion table guide, back pain relief, spinal decompression, beginner inversion, inversion therapy progression, safe inversion techniques, home exercise equipment, spinal health, inversion table safely, back pain treatment, physical therapy alternatives